
InspectAPedia® FREE Encyclopedia of Building & Environmental Construction, Diagnosis, Maintenance & Repair |
Question? Just ask us! InspectAPedia
|
 Paint Sample Cross-Section Preparation and Analysis Procedures
- POST a QUESTION or COMMENT about paint failure analysis for buildings
Paint failure sample section & preparation:
This article describes a simple procedure for preparing cross-section cut paint samples for reflected light low to high magnification microscopic examination in the paint failure laboratory. A procedure is described for mounting sectioned paint chips on edge for microscopic examination.
This procedure is useful in the determination of paint layers, paint layer thickness measurement, and paint layer interactions. The procedure also permits detection of mold or debris which has been painted over.
InspectAPedia tolerates no conflicts of interest. We have no relationship with advertisers, products, or services discussed at this website.
How to Prepare a Cross-Sectional View of Failing Paint Chips for Paint Failure Diagnosis
 The diagnosis and cure of paint failure on
buildings, particularly on wood siding and trim, is quite possible if there
is a careful and thorough inspection of the building, its history, its surfaces, and the actual points of paint
failure.
The diagnosis and cure of paint failure on
buildings, particularly on wood siding and trim, is quite possible if there
is a careful and thorough inspection of the building, its history, its surfaces, and the actual points of paint
failure.
It is diagnostic to compare the same coating on the same type of surface at different locations on a building and in areas of failed and not-failed paint.
[Click to enlarge any image]
In addition to the examination of the flat surfaces of paint chips under the microscope, the examination of edge-view sectioned paint chips can yield important information. Yet some analysts may be unfamiliar with simple and quick procedures that permit examination of paint in this diagnostic view. It is this more unusual edge view procedure which we want to document here.
We make use of a sample lamination procedure introduced by the McCrone Research Institute, Chicago, IL. McCrone offers advanced courses in forensic microscopy useful across various disciplines. (The author has no affiliation with McCrone but is a graduate of a number of McCrone's courses.)
The examination of the edge of a paint chip sample can provide critical information such as:
- The number of individual paint layers on the surface represented by the paint chip sample. The building history is visible in its paint layers, including paint thickness, paint colors, and in some cases even the weather conditions during the painting process are all visible in this forensic approach to paint investigation.
- Precise measurements of each individual paint thickness layer, and, by examining along individual samples as well as by examining multiple paint samples, the variation in paint thickness per layer can also be estimated.
- Identification of micro blisters in paint such as those caused by thermal blistering or solvent blistering in paint
- The presence of debris or mold between and in paint layers can be viewed and documented
The photographs and text here show how a paint chip can be prepared for a sectioned or edge-view by either low-power stereomicroscope, or by high power forensic microscope. Click any photo to see a larger image.
[Click to enlarge any image]
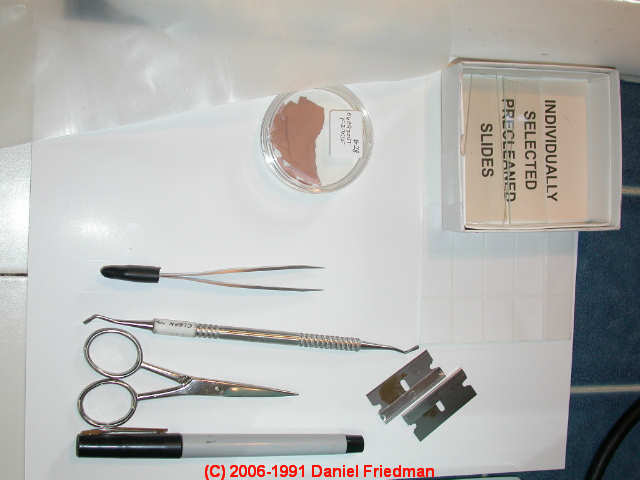
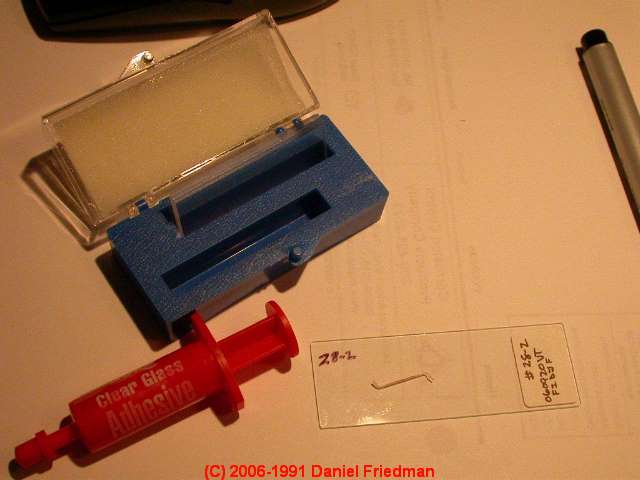
1. Photo of the basic equipment needed to prepare a sectional slice of a paint chip for edge-view microscopic examination.
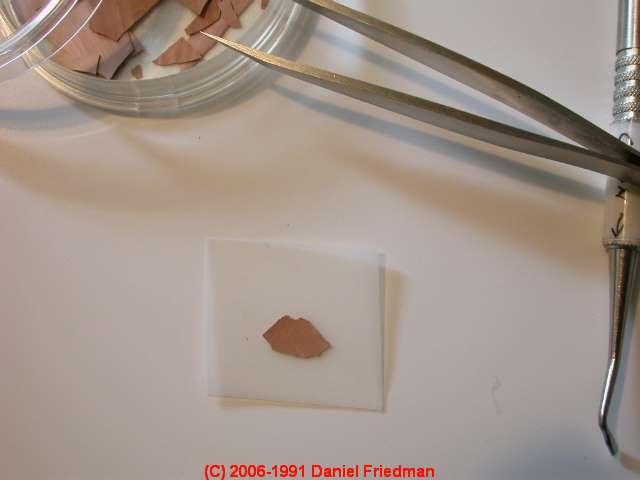
2. Place the selected paint chip on top of a square of clean 6-mil polyethylene sheeting. The square can be oversized to about 1" x 1" or so as it will be trimmed later.
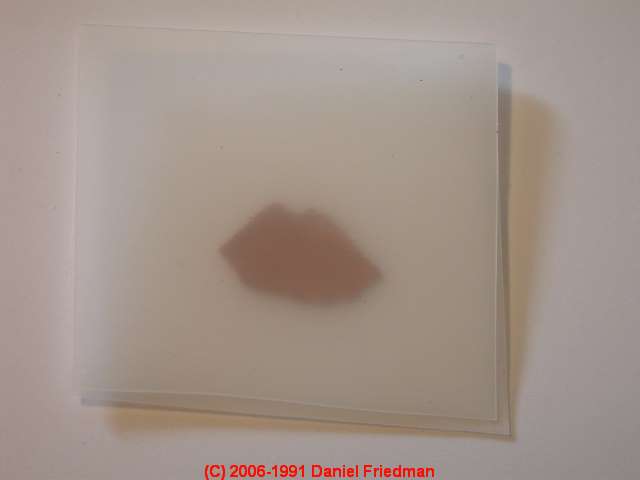
3. Place a second square of clean 6-mil poly atop the sample, aligning the edges to make a neat 1" x 1" sandwich of paint chip between the two layers of plastic.

4. Place the sample sandwich between two clean glass slides and atop a heating plate such as shown in the photo. You may have to experiment to find the right hot plate temperature to fuse but not over-melt or burn the poly or the paint sample so experiment with non-critical sample material first.
5. This photo shows the poly incompletely fused. More heating was necessary. Our object is to fuse the two layers of poly together so that the paint chip will be firmly secured between them.
6. When the poly has become sufficiently hot and is melting together we press it gently to remove air bubbles and to confirm that the two layers of plastic have become fused. There is no problem taking the assembly off of the heater and then returning it to that surface. Be careful of burns.
7. Here you can see that the poly is nicely fused but not over-melted or bubbling.
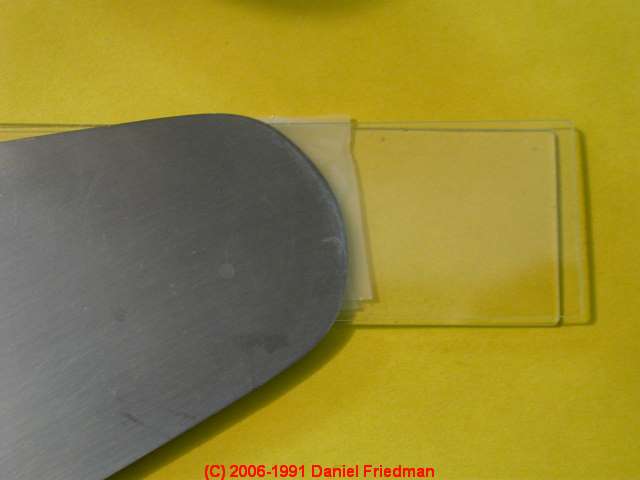
8. We cool the sample slides and poly atop a steel spatula used to remove it from the hot plate surface.
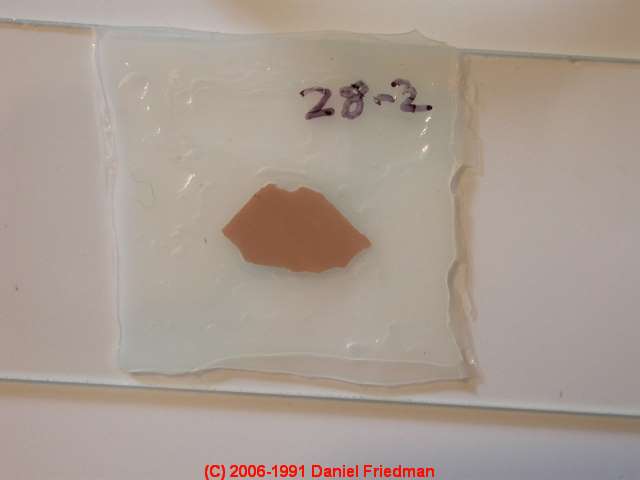
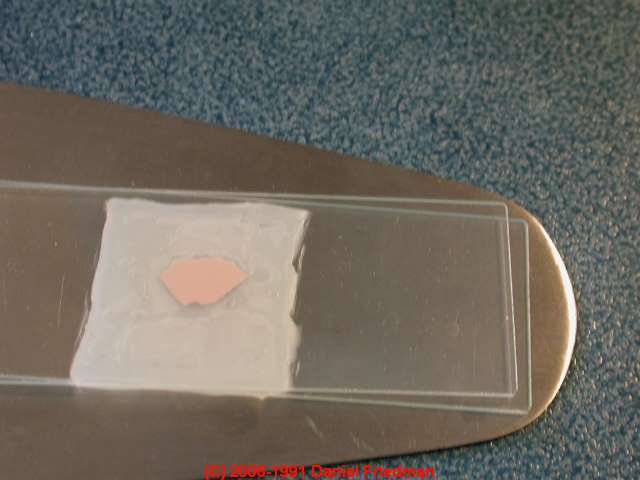
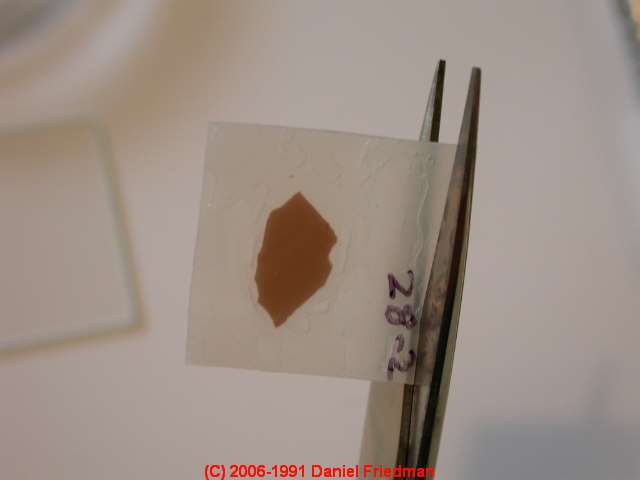
9. The sample is immediately numbered with our lab control number again to avoid any possible mix-up. However as we normally prepare, examine, and photo document one sample at a time there is no real chance for a sample labeling or handling error. Keep sample labels identical to those used in the chain of custody form and original sample material labels.
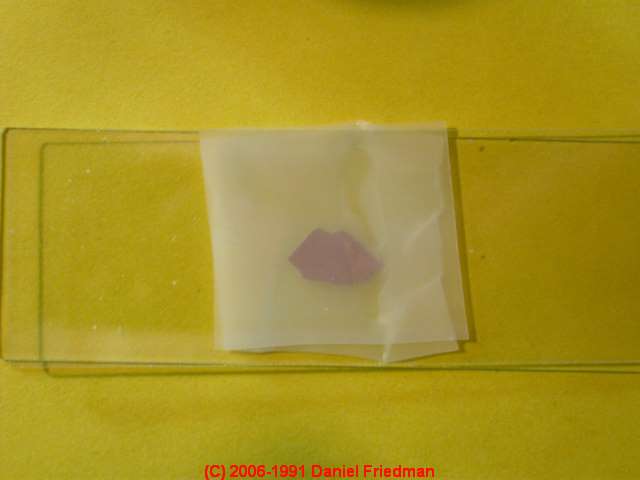
10. Trim the sample poly sandwich to approximately 20cm x 20 cm square.

11. A simple stainless steel single-edge razor blade, carefully handled, can produce a sample cross section thin enough for microscopic examination. We will be using reflected, not transmitted light in most instances with these samples. Cut a thin slice of sample sandwich, 1mm or less in thickness, keeping the slice oriented so that you don't lose track of which is the edge view.
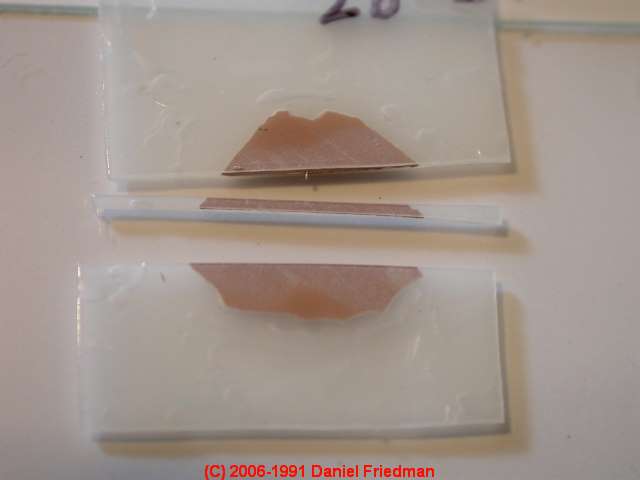
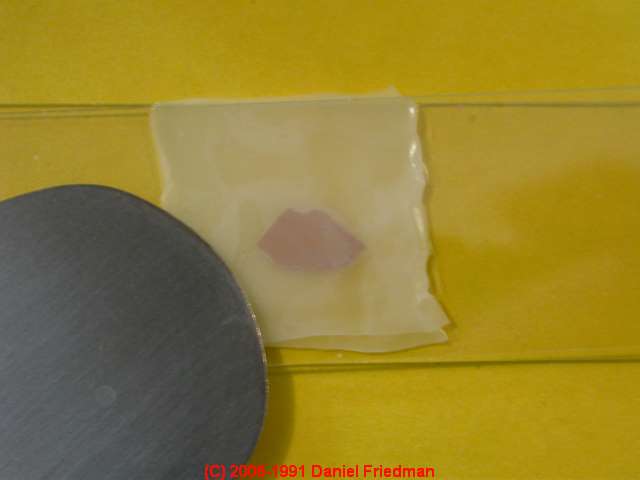
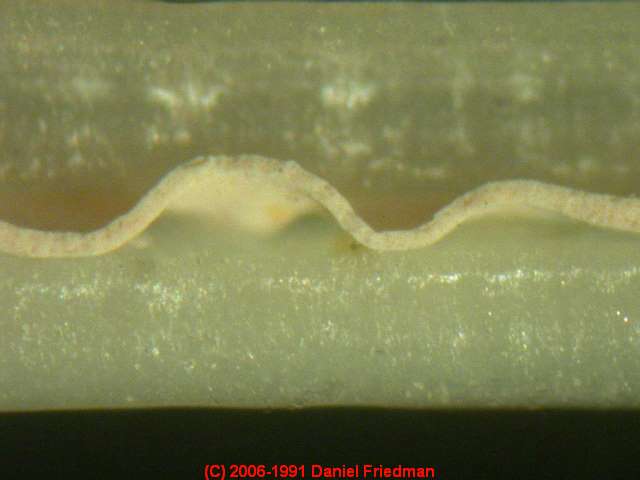
12. Here is our sliced sample cross-section. The sample side facing up on this slide is not what we want to examine as it shows the sample face, not its cross section.
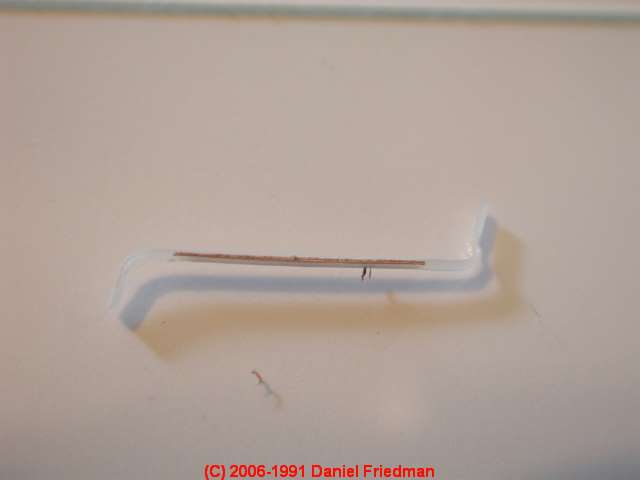
13. So we carefully turn the paint sample sectional slice on its side, exposing its cross section. To keep the sample in the proper orientation, notice that we bent over the plastic ends of the poly sandwich at roughly 90 deg. at each end.
14. The sliced, bent paint chip sample section is placed on a clean microscope slide.
15. As we wanted to make a permanent slide mount of this sample, and as we didn't want any chemical interaction with the sample, we mounted this cross section of paint chip using clear glass adhesive.
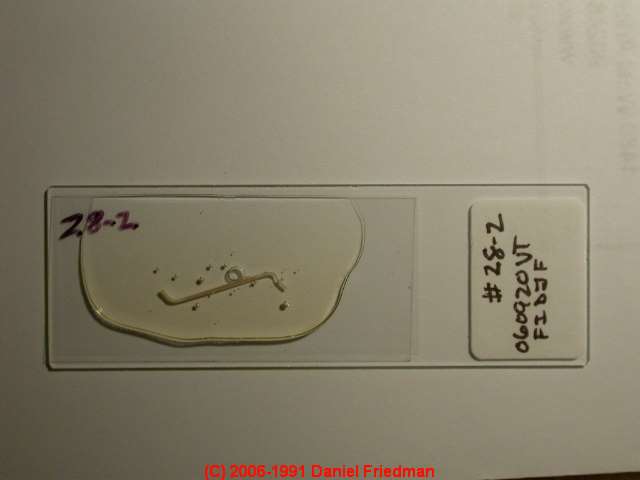
16. Here's our paint sample cross sectional slice mounted in glass adhesive
and with a 50mm x 22mm cover slip, ready for curing.
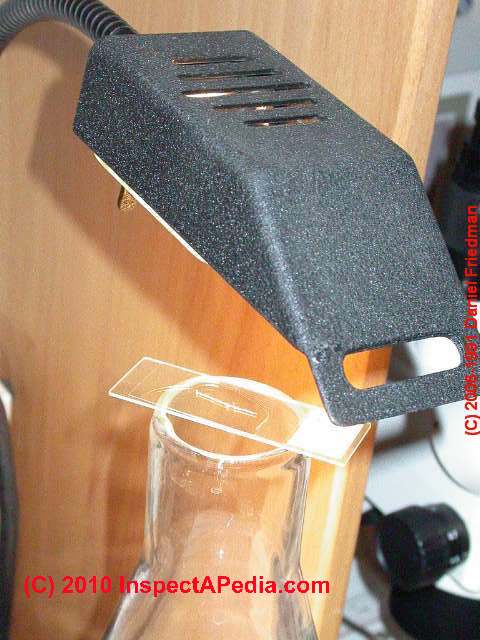
17. Clear glass adhesive has some nice optical properties, but it needs to be cured by UV light. Rather than place our sample outside in the sun we used this halogen lamp to harden the slide preparation.
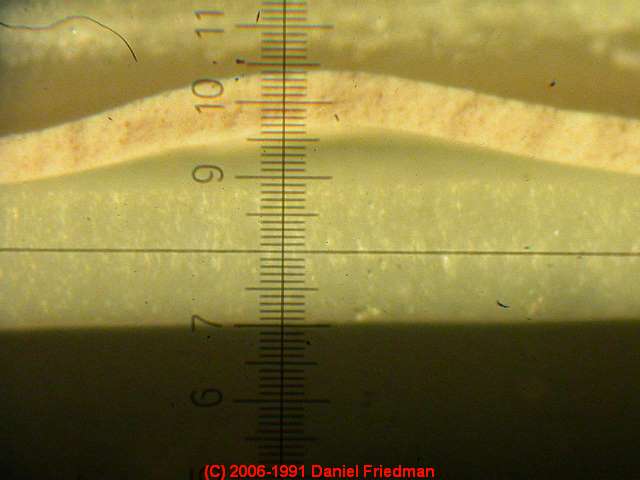
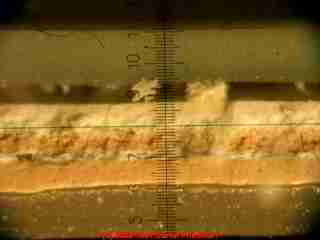
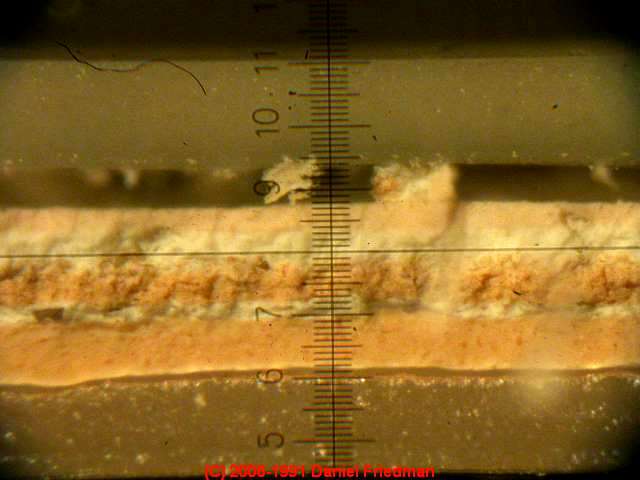
18. Here are some interesting paint chip cross section slices. By calibrating our eyepiece micrometer using a stage micrometer, we can measure paint layer thickness.
Other photos here are examples of microscopic blistering which was not visible except
at high magnification but quite dramatic when viewed in cross section as shown here. These observations at 120X magnification
and top lighting on our forensic microscope were useful in diagnosing the cause of failure of this paint coating.
...
Continue reading at PAINT FAILURE INDICATORS or select a topic from the closely-related articles below, or see the complete ARTICLE INDEX.
Or see these
Recommened Articles
- PAINT FAILURE, DIAGNOSIS, CURE, PREVENTION - home
- PAINT FAILURE DICTIONARY - illustrated list of all types of paint failures
- PAINT FAILURE LAB ANALYSIS
Suggested citation for this web page
PAINT FAILURE CROSS SECTION at InspectApedia.com - online encyclopedia of building & environmental inspection, testing, diagnosis, repair, & problem prevention advice.
Or see this
INDEX to RELATED ARTICLES: ARTICLE INDEX to PAINTS & STAINS & FAILURES
Or use the SEARCH BOX found below to Ask a Question or Search InspectApedia
Ask a Question or Search InspectApedia
Try the search box just below, or if you prefer, post a question or comment in the Comments box below and we will respond promptly.
Search the InspectApedia website
Note: appearance of your Comment below may be delayed: if your comment contains an image, photograph, web link, or text that looks to the software as if it might be a web link, your posting will appear after it has been approved by a moderator. Apologies for the delay.
Only one image can be added per comment but you can post as many comments, and therefore images, as you like.
You will not receive a notification when a response to your question has been posted.
Please bookmark this page to make it easy for you to check back for our response.
Our Comment Box is provided by Countable Web Productions countable.ca
Citations & References
In addition to any citations in the article above, a full list is available on request.
- Leila Kotama, Product Manager, Tikkurila Paints Oy, Finland. Dr. Kotama has more than 20 years experience as a paint chemist.
- Runeberg, Ulrik, STAINING AND MICROBIOLOGICAL INFESTATION OF ACRYLIC PAINTINGS ON HARDBOARD [PDF] (2008),Conservator (Dipl. Rest./M.A.), Restaurierungszentrum der Landeshauptstadt Düsseldorf, Germany, Email: Rune-Ulrik@gmx.de Previously Museo de Arte Contemporáneo de Puerto Rico, San Juan Presented, April 2007 conference in Richmond Virginia, sponsored by the AIC (American Institute for Conservation), this paper discusses the staining and microbial infestation of acrylic paintings on hardboard. - private correspondence, ER <->DF 2020/01/05 - 2006/09/12. (Also see PAINT FALURE, DIAGNOSIS, CURE, PREVENTION)
- Bodycote Materials Testing, Ontario, Canada
- Paint and Surface Coatings, Theory and Practice, R. Lambourne & T.A. Strivens, Ed., Woodhead Publishing Ltd., William Andrew Publishing, 1999 ISBN 1-85573-348 X & 1-884207-73-1 [This is perhaps the leading reference on modern paints and coatings, but is a difficult text to obtain, and is a bit short on field investigation methods - DF]
Provides a comprehensive reference source for all those in the paint industry, paint manufacturers and raw materials suppliers, undergraduate and postgraduate students, and industrial paint users. R. Lambourne was in the Research Department at ICI Paints Division and the Industrial Colloid Advisory Group, Birstol University, UK. - Paint Test Laboratory Listings Welcome: independent forensic and microscopic or chemistry labs offering paint analysis or paint failure services are welcome to be listed here at no fee. Contact Us
- Analysis of Modern Paints, Thomas J.S. Learner, Research in Conservation, 2004 ISBN 0-89236-779-2 [Chemistry of modern paints, overview of analytical methods, pyrolysis-gas chromatography signatures of basic modern paints and their constituents, Fourier transform infrared spectroscopy for paint analysis, direct temperature-resolved mass spectrometry, and analysis in practice - technical reference useful for forensic paint science, focused on art works -DF]
- In addition to citations & references found in this article, see the research citations given at the end of the related articles found at our suggested
CONTINUE READING or RECOMMENDED ARTICLES.
- Carson, Dunlop & Associates Ltd., 120 Carlton Street Suite 407, Toronto ON M5A 4K2. Tel: (416) 964-9415 1-800-268-7070 Email: info@carsondunlop.com. Alan Carson is a past president of ASHI, the American Society of Home Inspectors.
Thanks to Alan Carson and Bob Dunlop, for permission for InspectAPedia to use text excerpts from The HOME REFERENCE BOOK - the Encyclopedia of Homes and to use illustrations from The ILLUSTRATED HOME .
Carson Dunlop Associates provides extensive home inspection education and report writing material. In gratitude we provide links to tsome Carson Dunlop Associates products and services.
 | HOME | ABOUT | ASK a QUESTION | CONTACT | CONTENT USE POLICY | DESCRIPTION | POLICIES | PRIVACY | |
| © 2024 - 1985 Publisher InspectApedia.com - Daniel Friedman | |||||||||