
InspectAPedia® FREE Encyclopedia of Building & Environmental Construction, Diagnosis, Maintenance & Repair |
Question? Just ask us! InspectAPedia
|
 Power Tool Use & Safety Tips for Framers & Carpenters
Deck Design-Build Online Guide

- POST a QUESTION or COMMENT about deck construction
Safety tips for using power tools for deck & stair building. As we discussed at DECK BUILDING & CARPENTRY TOOLS even the simple hand tools used in carpentry provide plenty of opportunities to stab yourself or make a mess. But it's a bad carpenter who blames his tools.
Here we provide use and safety advice for power tools used during deck or stair building. This article series describes the steps in design & construction of exterior decks, deck railings, stairs & stair railings.
InspectAPedia tolerates no conflicts of interest. We have no relationship with advertisers, products, or services discussed at this website.
How to Use Power Tools & Power Tool Safety for Wood Frame Construction
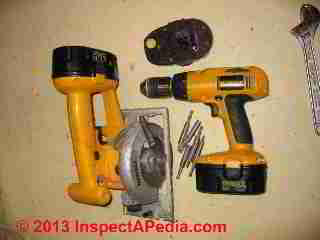
Drills To Use When Building Your Deck
You will need to make pilot holes for bolts and screws, but, with a change of bits, you can also use it to drive screws. As your deck-building project moves along, you will not regret having a couple of drills available.
[Click to enlarge any image]
A corded drill is handy for heavy- duty use, while a cordless drill is often more convenient. If you need to drill holes in concrete, you will appreciate having a hammer drill, which can also serve as your regular corded drill.
Drilling Pilot Holes Avoids Splits at Board Ends
When driving nails or screws near the ends of boards, you stand a good chance of splitting a board and thus minimizing the strength of the connection. To avoid this, first drill a pilot hole using a drill bit slightly smaller in diameter than the screw or nail, then drive the fastener into place. Drill pilot holes for carriage bolts and lag screws as described below.
Drilling Pilot Holes for Bolts
When installing carriage bolts, first drill a pilot hole all the way through the lumber. Lag screws, which are often used to attach ledgers, require two drilling steps, as shown below. For 1/2-inch lag screws, first drill a 1/2-inch- diameter pilot hole into the wood that extends completely through the first board and is at least as deep as the unthreaded shank on the screw.
Then drill a hole to the intended depth of the screw, making the hole diameter match the solid core of the threaded part of the screw, about 5/l6 inch. Put a washer on the lag screw. Then, with an adjustable wrench or a socket wrench, turn the lag screw into the hole. Use a screw that penetrates as deeply as possible into the wood without poking out the back side of the second piece of wood.
Using a Router in Woodworking Projects
A router is a nearly essential tool for woodworking projects and a handy tool for certain deck- building chores. To create neat, smooth edges on decking, posts, handrails, and stair treads, use a router with a round-over bit that produces a 3/8- or 1/2-inch radius.
A carbide-tipped bit with a ball- bearing pilot will give the best results. To create 45-degree beveled edges, use a chamfering bit.
Power Sanders for Deck Projects
If your lumber, especially the ends of the decking, is a little rough, a quick pass with a belt sander will smooth it out. A smaller random- orbit or finish sander can be used to accomplish the router tasks described above. The results will be a bit less uniform than if a router is used.
Using a Power Miter Saw
A power miter saw (less formally known as a “chop saw”) can speed up a number of jobs in deck building. Although most of the cuts it can perform can be made with a circular saw, a power miter saw makes them cleaner and straighten Miters and bevels can be cut quickly and neatly. And for repetitive tasks, such as cutting dozens of balusters to identical lengths, a power miter saw set up with a stop block, as shown in the photo at left, is unbeatable.
Uses For a Reciprocating Saw in Framing Projects
A reciprocating saw can cut much thicker pieces of wood than a standard circular saw. If you are installing 6x6 posts, you will be able to cut them to length quickly using a reciprocating saw with a long blade. Even 4x4 posts can be cut more quickly with a reciprocating saw, since you would need to make two passes (on opposing sides) if you used a circular saw.
Extension Cord Tips for Framers
You will need an outdoor extension cord or two to operate power tools outside. Check the owner’s manuals for your tools for guidelines on gauges and lengths of extension cord to use. And always make sure that the extension cord is GFCI- protected. If no GFCI outlet is available, use a cord with an in-line GFCI.
Deck or Other Framing Project Jobsite Safety
Any construction site is a potential safety concern. You can minimize the dangers by learning how to operate power tools safely, wearing appropriate safety gear, and using your common sense. Keep the area around the deck clean of lumber scraps and other debris. If you are working under a hot sun, drink plenty of water and take frequent breaks.
Avoid lifting heavy loads; get a helper if you need one. And if you are feeling tired or sore from spending too much time working on the deck, take a few days off.
Handling Power Tools
If you are using a power tool for the first time, read the owner’s manual and practice on some scrap lumber. Always keep the tool unplugged when it is not in use for an extended period, or when you are making an adjustment or changing a blade. To guard against deadly shocks, make sure that all power tools are connected to a GFCI-protected outlet. When you leave the work site, put power tools away so that children cannot reach them.
Advice for Working with Treated Wood
Some varieties of treated wood contain toxic ingredients, although newer, safer products are becoming increasingly available. When working with any type of treated wood, it is smart to take the following safety precautions:
- Use treated lumber only where its protection is needed.
- Use only treated wood that is visibly clean and free of surface residue.
- Clean up all sawdust and construction debris from the work site.
- Do not burn any lumber scraps. Instead, dispose of them with regular trash.
- When cutting or sanding, wear a dust mask and eye goggles.
- Wear gloves when handling the wood. Wash your hands before eating or drinking.
- Seal the wood with a water- repellent finish at least every two years.
- Treated lumber is required by many building codes. A useful strategy for minimizing contact with it is to use it for the posts, ledger, beam, and joists, and to use one of the other options for the decking and railings;
Details are at PRESERVATIVE TREATED LUMBER
Working Off the Ground
If you are building a deck over a steep slope or outside an upstairs entrance, you must take some extra precautions to ensure a safe work site. In most cases, you can probably get by with a couple of stepladders and a helper or two. To reach higher locations, use extension ladders.
If the job requires that you work above ground for much of the project, or if you need to lift a heavy beam over your head, consider renting some scaffolding. Installed correctly, scaffolding is the easiest and safest way to work off the ground.
Ladder Safety
Use the right ladder for the job. Match the load capacity of the ladder with the weight you need to put on it, including your own. Place the legs on level ground. Extension ladders and closed stepladders should lean against a solid surface, ideally with both the bottom and top secured.
Placing boards under one leg of a ladder to make it level is dangerous. A better solution is to dig out a level surface, then place the ladder on a 2 x 10 pad. Do not lean out from a ladder, and do not stand above the second rung from the top on a stepladder, or the fourth rung from the top on an extension ladder.
...
Continue reading at DECK DESIGN & BUILD or select a topic from the closely-related articles below, or see the complete ARTICLE INDEX.
Or see these
Recommended Articles
Suggested citation for this web page
POWER TOOL USE TIPS at InspectApedia.com - online encyclopedia of building & environmental inspection, testing, diagnosis, repair, & problem prevention advice.
Or see this
INDEX to RELATED ARTICLES: ARTICLE INDEX to BUILDING DECKS & PORCHES
Or use the SEARCH BOX found below to Ask a Question or Search InspectApedia
Or see
INDEX to RELATED ARTICLES: ARTICLE INDEX to BUILDING STRUCTURES
Or use the SEARCH BOX found below to Ask a Question or Search InspectApedia
Ask a Question or Search InspectApedia
Try the search box just below, or if you prefer, post a question or comment in the Comments box below and we will respond promptly.
Search the InspectApedia website
Note: appearance of your Comment below may be delayed: if your comment contains an image, photograph, web link, or text that looks to the software as if it might be a web link, your posting will appear after it has been approved by a moderator. Apologies for the delay.
Only one image can be added per comment but you can post as many comments, and therefore images, as you like.
You will not receive a notification when a response to your question has been posted.
Please bookmark this page to make it easy for you to check back for our response.
Our Comment Box is provided by Countable Web Productions countable.ca
Citations & References
In addition to any citations in the article above, a full list is available on request.
- [1] Steve Bliss's Building Advisor at buildingadvisor.com helps homeowners & contractors plan & complete successful building & remodeling projects: buying land, site work, building design, cost estimating, materials & components, & project management through complete construction. Email: info@buildingadvisor.com
Steven Bliss served as editorial director and co-publisher of The Journal of Light Construction for 16 years and previously as building technology editor for Progressive Builder and Solar Age magazines. He worked in the building trades as a carpenter and design/build contractor for more than ten years and holds a masters degree from the Harvard Graduate School of Education. Excerpts from his recent book, Best Practices Guide to Residential Construction, Wiley (November 18, 2005) ISBN-10: 0471648361, ISBN-13: 978-0471648369, appear throughout this website, with permission and courtesy of Wiley & Sons. Best Practices Guide is available from the publisher, J. Wiley & Sons, and also at Amazon.com - [2] Decks and Porches, the JLC Guide to, Best Practices for Outdoor Spaces, Steve Bliss (Editor), The Journal of Light Construction, Williston VT, 2010 ISBN 10: 1-928580-42-4, ISBN 13: 978-1-928580-42-3, available from Amazon.com
- [3] Prescriptive Residential Wood Deck Construction Guide, based on the 2009 International Residential Code, American Forest & Paper Association, Inc., provided by reader Mark Morsching from Everflashing.
- [4] Mark Morsching, Everflashing, Tel: 800-550-1667, Email: everflashing@gmail.com. The Everflashing product comes in G-185 and Stainless Steel and is intended for use with treated lumber with copper in it. Everflashing produces a variety of specialty flashing products including flashings for use with decks at deck ledgers and deck perimeters.
- [2] Manual for the Inspection of Residential Wood Decks and Balconies, by Cheryl Anderson, Frank Woeste (Forest Products Society), & Joseph Loferski, October 2003, ISBN-13: 978-1892529343,
- [5] Claudia Hudson, Asheville NC, Tel: 828-252-0644 Email: claudiahudson@charter.net . Ms. Hudson is an SEO copyrighter / content writer. She has provided background research and text for InspectApedia's articles on deck and porch construction methods & procedures. April 2013.
- In addition to citations & references found in this article, see the research citations given at the end of the related articles found at our suggested
CONTINUE READING or RECOMMENDED ARTICLES.
- Carson, Dunlop & Associates Ltd., 120 Carlton Street Suite 407, Toronto ON M5A 4K2. Tel: (416) 964-9415 1-800-268-7070 Email: info@carsondunlop.com. Alan Carson is a past president of ASHI, the American Society of Home Inspectors.
Thanks to Alan Carson and Bob Dunlop, for permission for InspectAPedia to use text excerpts from The HOME REFERENCE BOOK - the Encyclopedia of Homes and to use illustrations from The ILLUSTRATED HOME .
Carson Dunlop Associates provides extensive home inspection education and report writing material. In gratitude we provide links to tsome Carson Dunlop Associates products and services.
 | HOME | ABOUT | ASK a QUESTION | CONTACT | CONTENT USE POLICY | DESCRIPTION | POLICIES | PRIVACY | |
| © 2024 - 1985 Publisher InspectApedia.com - Daniel Friedman | |||||||||